Showing posts with label Tips and Tricks. Show all posts

Friday, December 30, 2011

That Was Easy...

As we embark on a New Year, I thought I would share a great email I received the other day from a dear friend.  She knows I am a tip fanatic.  I don't know the original source of this... but who ever did this is a genius. 

 Hull strawberries easily using a straw.

Rubbing a walnut over scratches in your furniture will disguise dings and scrapes.

Remove crayon masterpieces from your TV or computer screen with WD40
(also works on walls).

 Stop cut apples browning in your child’s lunch box by securing with a rubber band.

 Overhaul your linen cupboard – store bed linen sets inside one of their own
Pillowcases and there will be no more hunting through piles for a match.

\Deborah\eas to make life easier
Pump up the volume by placing your iPhone / iPod in a bowl – the concave shape
Amplifies the music.

Re-use a wet-wipes container to store plastic bags.
 
Add this item to your beach bag. Baby powder gets sand off your skin easily –
Who knew?
.

Attach a Velcro strip to the wall to store soft toys.

Look up! Use wire to make a space to store gift wrap rolls against the ceiling,
Rather than cluttering up the floor.

 
Gotcha! Find tiny lost items like earrings by putting a stocking over the vacuum
hose.

Make an instant cupcake carrier by cutting crosses into a box lid.

  For those who can't stand the scrunching and bunching:  how to perfectly
Fold a fitted sheet.

Forever losing your bathroom essentials? Use magnetic strips to store bobby
Pins (and tweezers and clippers) behind a vanity door.

A tip for holiday packing. Store shoes inside shower caps to stop dirty soles
Rubbing on your clothes. And you can find them in just about every hotel!

A muffin pan becomes a craft caddy. Magnets hold the plastic cups down to
Make them tip-resistant.

Bread tags make the perfect-sized cord labels.

  Bake cupcakes directly in ice-cream cones – so much more fun and
easier for kids to eat.  Love this idea.

Microwave your own popcorn in a plain brown paper bag. Much healthier and
Cheaper than the packet stuff.

  Brilliant space-saver: install a tension rod to hang your spray bottles. Genius! 
This is going on my must have shopping list.

Win friends at breakfast with this heart-shaped egg tutorial. 
Wouldn't this be perfect for a Valentine's breakfast.

Turn your muffin pan upside down, bake cookie-dough over the top and voila –
You have cookie bowls for fruit or ice-cream. Click here for recipe.

Freeze Aloe Vera in ice-cube trays for soothing sunburn relief.

Gutter garden:  Create a window-box veggie patch using gutters.
Perfect for a herb garden.

Use egg cartons to separate and store your Christmas decorations. 


 Hope you found a few ideas that will make your life a little easier too. 

Back to the tedious job of painting a spare bedroom... hmmm, anyone got a few tips on making that job easier?


Hugs,

Sunday, October 16, 2011

History repeats itself... Before & After

I have had my eye on this sign for awhile now. Lately it seems I have been gravitating to the Ballard Design creations.  There isn't too much I don't like from their vintage collection.  They make my heart sing.  Their pieces speak to me... I love the challenge of stepping out of my comfort zone.

I loved the shape of this sign, rather than a straight board.  It promptly went in my inspiration file for future consideration.  The first thing I do when I am bored is pull up the file and see if something bites and hope it will motivate me to get back down to the workshop.

Yesterday, was one of those days.  Housework was all done, outside work was on hold due to rain... hence a guilt free play day. 

A friend gave me this board a year or so ago and there it sat in my garage along with all the other piles in waiting.  I didn't quite know what to do with it... I knew that heart absolutely had to go and that was the last I thought about it...

until I needed a large board for my newest creation...
I cut it on each side of the heart, then screwed the two pieces together and drew the design...

using my miter and jig saw (first time using that, another one mastered) it was starting to take shape... 
I attached the two pieces using my Kreg Jig, Gorilla glue and a couple brackets for reinforcement...

I pulled a frame back out of my trunk that was destined for the Sally Ann...
cut it and used it for the top border...
glued and air nailed it in place.

Now onto the fun part...

this was my inspiration for the wording... if pictures could only talk,
I'd have a thousand questions for you.

This is my Great Great Grandfather, Andrew McNutt at his store in Nova Scotia.  Circa 1880 - 1910.   He was a very successful business man in his day... 


he went on to own the whole block, which was named after him.

My niece put me on to a long lost relative that provided me with this information along with numerous photos of the family.  Thanks so much Tim, I can't thank you enough. 
Who would have thought that making a piece of history would open so many doors. 
Before I made this I knew very little of my history.   
I used the Cricut to cut the letters (thanks Gail, I used contact paper to save on vinyl, worked great)... applied them to the board which I had previously painted black... painted the second colour over the letters... not so patiently waited for the paint to dry and peeled them off... (wait for the paint to dry,  not that I messed up a few because "Impatient" is my middle name)

I gave it a good sanding with 150 grit...

then applied ebony stain and a coat of Light Pine Briwax...

It now proudly hangs in my kitchen...

Now I have my own little piece of history to enjoy.

Looks like a piece that has been hanging around for 100+ years...
don't you think?

The best part is that it didn't cost me a penny... I had all the materials left over from other projects, even the paint was given to me.

Now you wanna know what Ballard Design charged?

So what do you think? 

I'm off to see what new piece I can steal borrow from them next...

Hugs,

Thursday, October 6, 2011

The low down on chalk paint...


Well I managed to finally shut one voice up in my head... I now know what kind of paint I am using if I do end up painting my cupboards and anything else that isn't nailed down. 


While doing some research, I came across a wonderful blog that has a recipe to make your own "chalk paint".  Don't worry I will share the link, hold tight.  As you well know that stuff is like liquid gold.  I can't tell you how elated I was to find out I can make my own and now so can you. 

I really wanted to try this stuff, no sanding, no priming... how much better can it get. Unfortunately the cheap side of my brain will not allow me to spend that kind of money on paint.  I don't care what it does.  Have you priced that stuff in Canada?   


Now for the other inquiring minds out there... here's the goods on the notorious "chalk paint".  This is just one ingredient that Sherry shares... there are two more.  I think this is the one I am going to choose. 


What is Calcium Carbonate?
Calcium carbonate, or CaCO3, comprises more than 4% of the earth’s crust and is found throughout the world. Its most common natural forms are chalk, limestone, and marble, produced by the sedimentation of the shells of small fossilized snails, shellfish, and coral over millions of years. Although all three forms are identical in chemical terms, they differ in many other respects, including purity, whiteness, thickness and homogeneity. Calcium carbonate is one of the most useful and versatile materials known to man.


Many of us encounter calcium carbonate for the first time in the school classroom, where we use blackboard chalk.


Paper, Plastics, Paints, and Coatings: Calcium carbonate is the most widely used mineral in the paper, plastics, paints and coatings industries both as a filler – and due to its special white color - as a coating pigment. In the paper industry it is valued worldwide for its high brightness and light scattering characteristics, and is used as an inexpensive filler to make bright opaque paper. Filler is used at the wet-end of paper making machines, and calcium carbonate filler allows for the paper to be bright and smooth. As an extender, calcium carbonate can represent as much as 30% by weight in paints. Calcium carbonate also is used widely as a filler in adhesives, and sealants. 

Now, run on over to this very kind lady that shared her recipe and her knowledge with us and be sure to thank her.  I am sure she is no stranger to many of you.  Her blog is to die for.  This woman has some serious talent happening.  Believe me you won't be disappointed.

Good luck and please if you try or have tried this would you be so kind to share your findings with the rest of us. 

Hugs,

Sunday, January 23, 2011

Before & After - Tut & Tip (updated)

I learned a good lesson today.  Never complain to a friend that you are bored when you have been hanging onto a cabinet of hers for months.  Mrs. C politely shamed me into getting it done so I got to work on it right away. 

I have had several people comment on this finish and this was what Mrs. C had requested to be done so I thought I would give the tut along the way. 

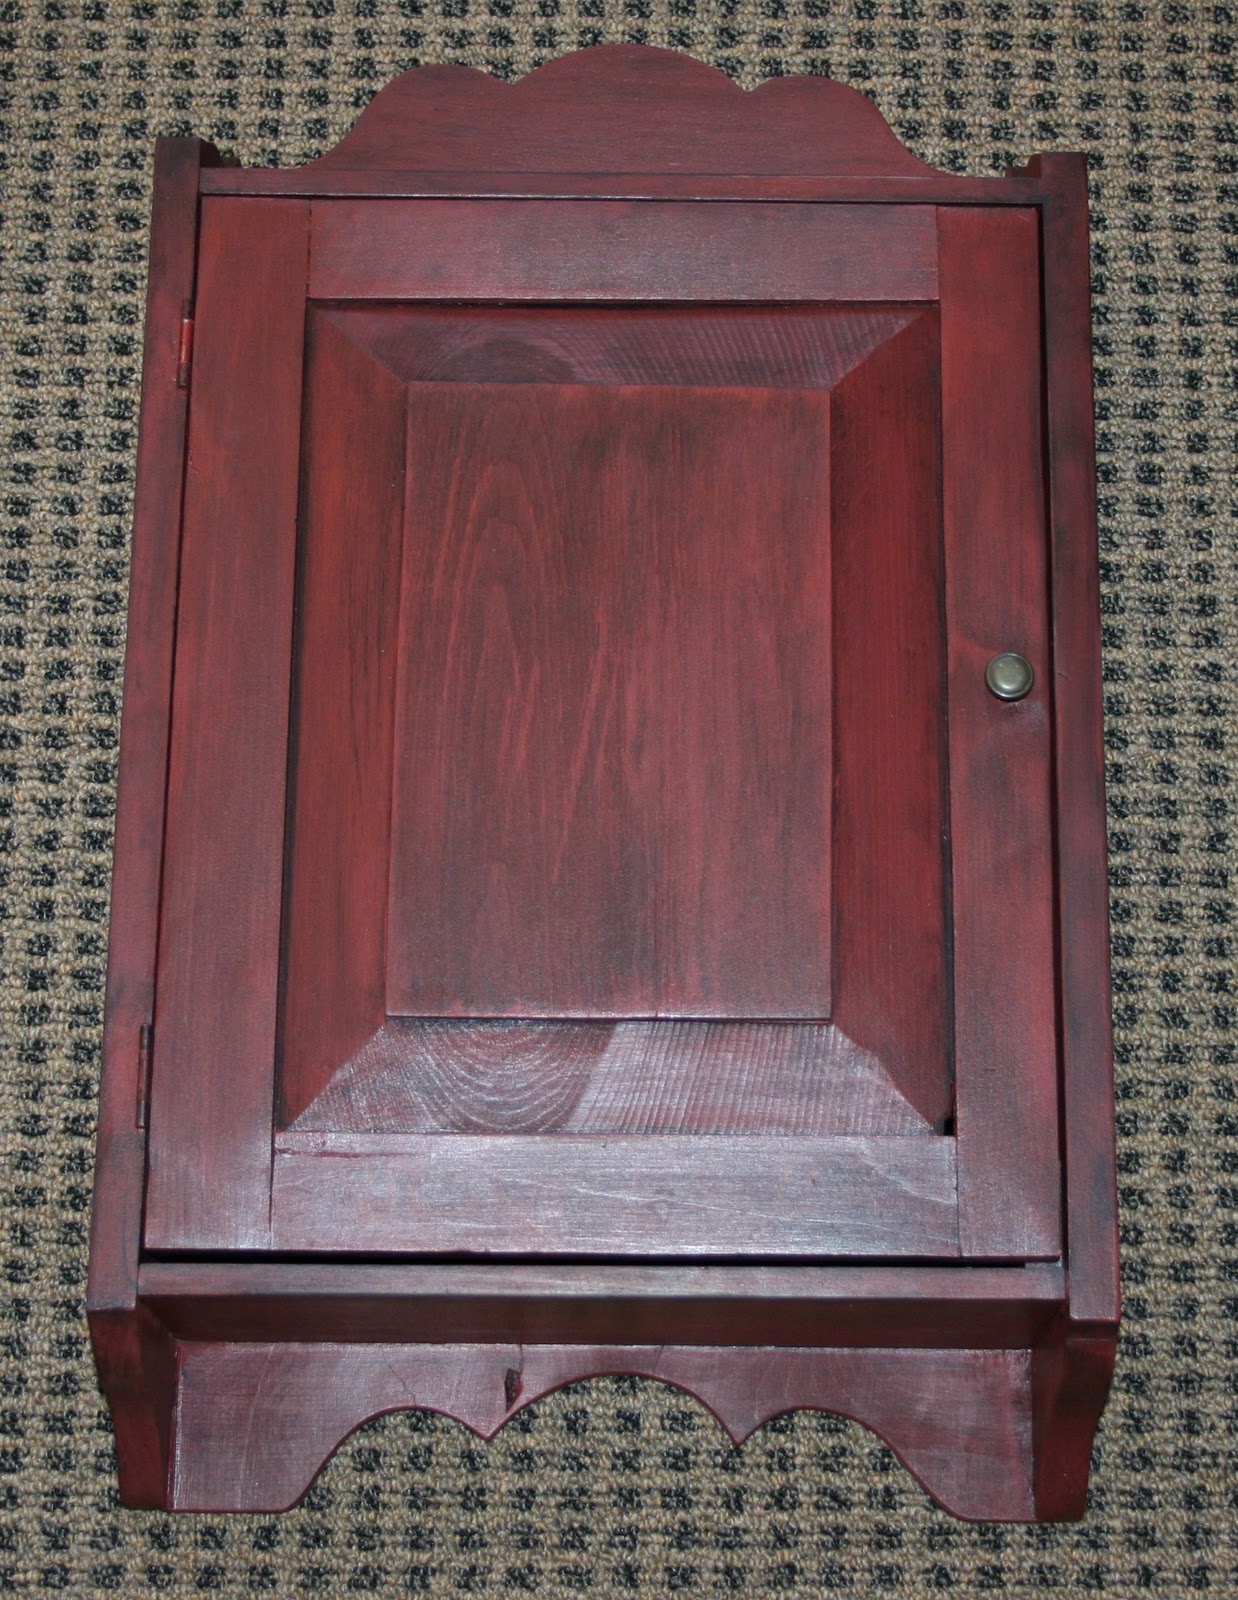
Mrs C's grandson made this in shop for her...
he did an awesome job, don't you think?

raw pine is a bit tricky to work with and I hate to prime...

so I put a coat of this on before staining...
this was the first time I used this and it worked amazingly well

this is a water based stain that goes a long way... dries quickly and very easy to work with. 
I wish I could remember where I bought this for that price... I love this stuff

I removed the door to make it easier to work on...

gave it two coats of stain... let dry...

eeek don't panic... it is all part of the process...

You will need the following for this step;
  • black paint
  • a bowl of water
  • paint brush
  • papertowels and damp rag

  • wet your paintbrush before starting
  • dilute black paint with water
  • dip wet brush into mixture and brush onto your piece (work in sections, this will dry quickly)

  • take a dry paper towel and lightly wipe piece
  • It will begin to look like this...
  • take a damp rag and again wipe lightly to remove any excess
  • play with it until you get the look you are happy with
the inside of the cabinet...

There you have it.

TIP OF THE DAY:  I use Ziploc baggies to store my paintbrushes in between coatings...  I don't always get back to the task as planned, only to find my paintbrush has gone hard... normally you would think the brush is ruined, fear not... wash as much paint off as you can then soak it in a small cup of  80% Downy and 10% water... let it sit and forget about it for awhile... later give it a good combing and all the residue will be gone... your brush will be like new.  

Mya's been shopping... how do you like my new coat?

she is a little upset that the hat didn't fit...lol  The little peanut is up to 10.4 lbs now...
The Doctor is very happy with her progress.

Well folks that is about all I have for you today... hope you are all staying warm in these frigid temps... but at least the sun is shining. 
It is 4°F (hit Alt 0176 for this the little degree symbol) here today.
My driveway could use a good shoveling but that isn't likely to happen today with this temperature.

 Have a great day.

Thanks for stopping by...

Hugs, Deb