I spent the better part of the weekend getting the shutters made... they will be installed today.
I tried to do a little tutorial along the way for you interested parties that might want to replace those plastic ones... they are inexpensive and easy to make.
The hardest decision you will make is what width of board you would like...
I chose a 3.5" W x 1" T...
(TIP: have the lumber company rip these out of a 12" board which is much cheaper in the long run... measure your height and have them cross cut the boards too).
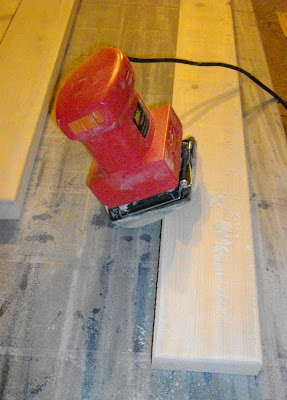
I used rough barn board so I had a lot of sanding to do... I don't suggest using this wood, next time I would spend the little extra and buy a smoother finish. I curved my edges as shown...
(TIP: put your sander on an angle and sand the edge rolling the sander back and forth, you just want to take the sharp edge off.
I left a 1/4" gap as these are going on a south wall... they will need a little breathing space for expanding and contracting. This is also a great fix if your boards don't line up perfectly.
- Clamp the boards together and measure your width for the batten.
(TIP: I used paint sticks between the boards for my gap... they will be pulled out later)
- measure 6" from the bottom and mark your line... cut and sand your batten, then use your angle square to line everything up...
- clamp the boards and batten tightly on both ends
(TIP: this is the best $20.00 you will ever spend... I have used this tool more in my workshop than any other tool).
- flip your boards over
- draw a line down the middle of the batten on the back
- drill and countersink holes...
- I used 1 1/2" screws...
- if you don't countersink holes then I suggest you use 1 5/8" screws for 1" boards
- do both ends
- remove clamps and paint sticks
there you have it... new rustic, wooden shutters
- stain boards (you can do this before or after assembly, your choice)
- I used Sherwin Williams semi-solid waterborne stain (great coverage, dries quickly and leaves a nice eggshell finish)
- affix hardware ( I found these on Ebay very CHEAP... they are just plastic but you would never know from a distance)
Now time for the installation... pictures to follow.
Hope this was helpful, if you have any questions please do not hesitate to pop me an email I will be happy to assist in any way I can.
Hugs, Deb


7 comments:
Nice tutorial, glad you were able to share it with us. I think that someday I could actually make these, LOL. I don't plan on taking mine down anytime soon especially since I just painted them so they would look good for a while longer. Maybe when we reside the house in a few years?? Have a relaxing day Deb!
I need to make these for my house, it has been looing naked lately!
great tute and tips! I can't wait to see the shutters installed!
Hope the weather holds out for you today.
gail
We have the plastic shutters and I'd love to replace them but it's just not in the budget. Maybe next spring we can replace them if we're not lucky enough to sell this place. Can't wait to see the big reveal.
I LOVE this! And drank in every tidbit of that tutorial.
And that clamp looks amazing. I need me one! I was always freehanding this stuff but I can see a clamp being like an extra set of hands here... oooooo I need to go shopping!! :)
Countersinking screws... do you use a special tool to achieve that?
Donna
http://funkyjunkinteriors.blogspot.com/
well, you've got all my attention. we'll be needing these, shortly, although nothing less than extra strong metal finishes here... one must keep the (perceived) thieves out.. italy is obsessed with this.
ok, it's so good in fact that i'd like to invite you to come link it up so our readers can find you also: http://www.finecraftguild.com/diy-linky-party-19/
every wednesday we'll have a new party, so you can come back week after week, okay, with equally amazingly good tutorials.
kiss on both cheeks for this one. you make it look ever so simple.
Great tutorial - I linked it to my "shutters" post today too!
Post a Comment