I learned a good lesson today. Never complain to a friend that you are bored when you have been hanging onto a cabinet of hers for months. Mrs. C politely shamed me into getting it done so I got to work on it right away.
I have had several people comment on this finish and this was what Mrs. C had requested to be done so I thought I would give the tut along the way.

Mrs C's grandson made this in shop for her...
he did an awesome job, don't you think?

raw pine is a bit tricky to work with and I hate to prime...

so I put a coat of this on before staining...
this was the first time I used this and it worked amazingly well

this is a water based stain that goes a long way... dries quickly and very easy to work with.
I wish I could remember where I bought this for that price... I love this stuff

I removed the door to make it easier to work on...

gave it two coats of stain... let dry...

eeek don't panic... it is all part of the process...
You will need the following for this step;
- black paint
- a bowl of water
- paint brush
- papertowels and damp rag
- wet your paintbrush before starting
- dilute black paint with water
- dip wet brush into mixture and brush onto your piece (work in sections, this will dry quickly)
- take a dry paper towel and lightly wipe piece
- It will begin to look like this...


- take a damp rag and again wipe lightly to remove any excess
- play with it until you get the look you are happy with

the inside of the cabinet...
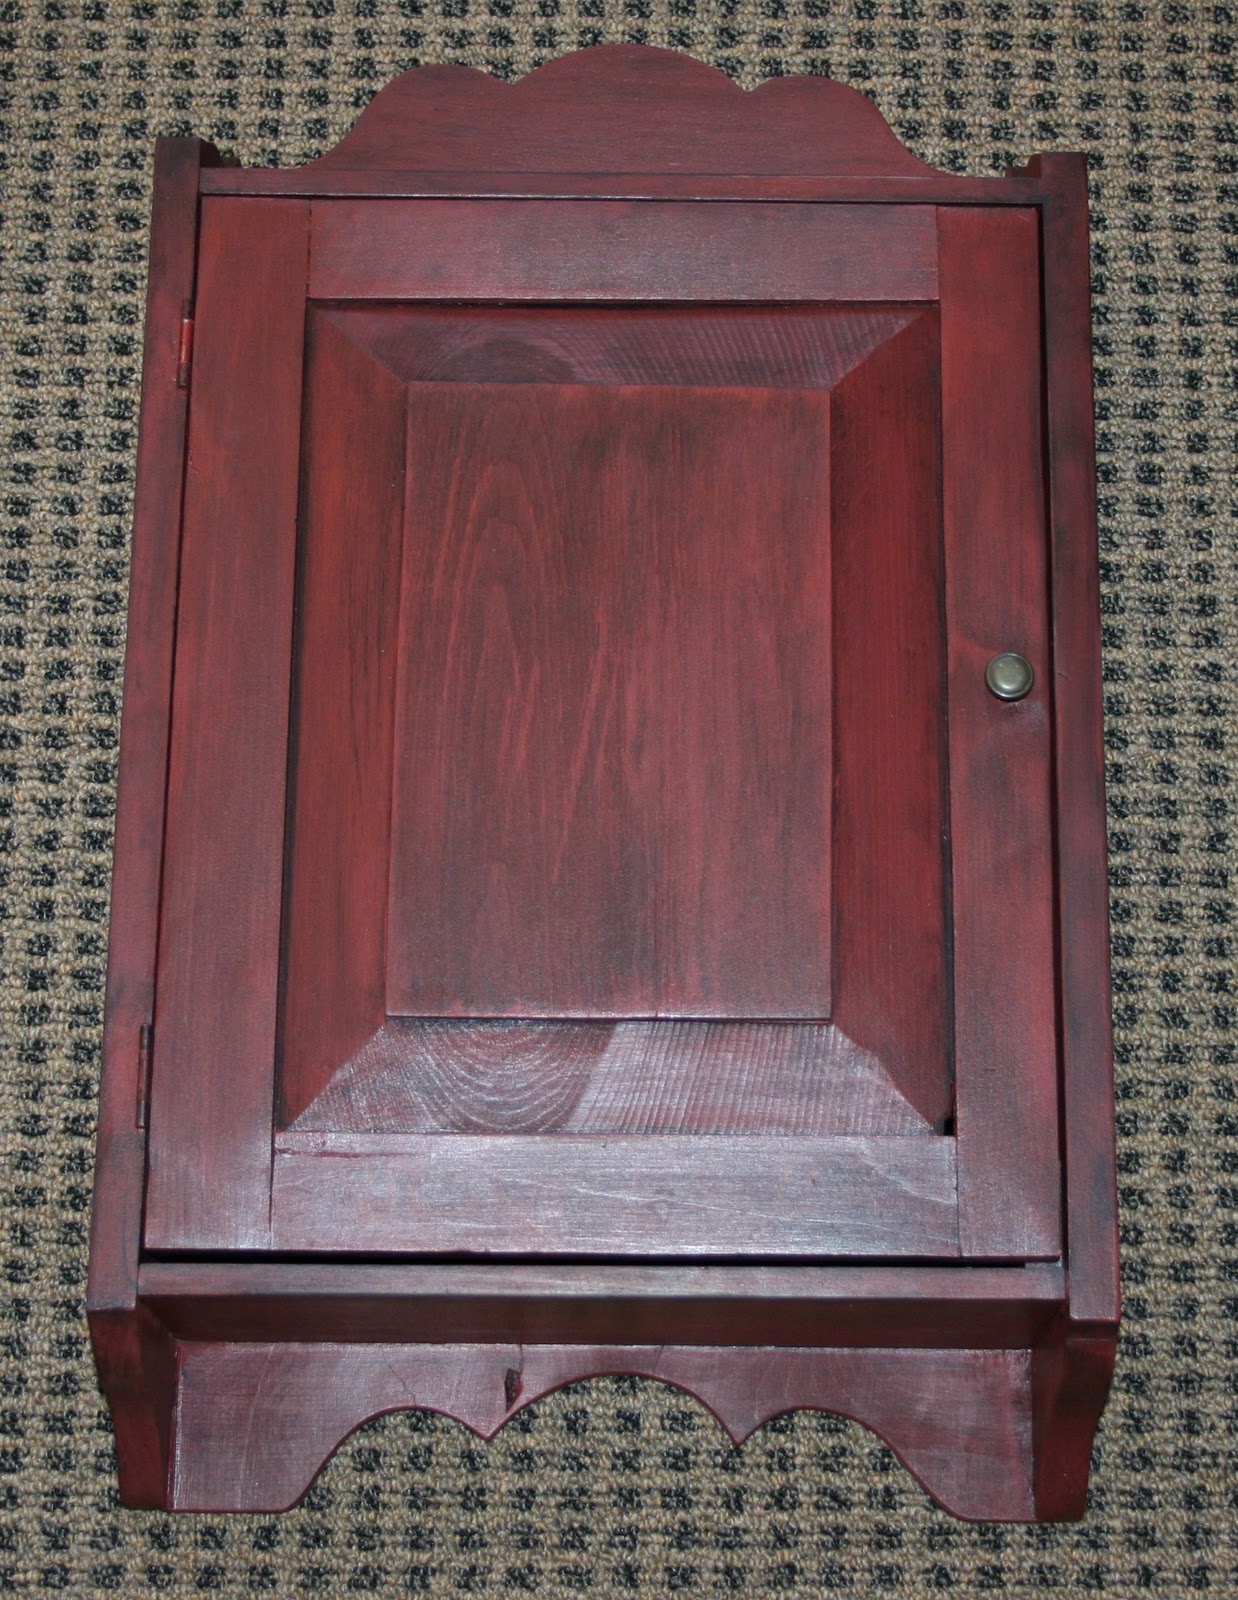
There you have it.
TIP OF THE DAY: I use Ziploc baggies to store my paintbrushes in between coatings... I don't always get back to the task as planned, only to find my paintbrush has gone hard... normally you would think the brush is ruined, fear not... wash as much paint off as you can then soak it in a small cup of 80% Downy and 10% water... let it sit and forget about it for awhile... later give it a good combing and all the residue will be gone... your brush will be like new.

Mya's been shopping... how do you like my new coat?

she is a little upset that the hat didn't fit...lol The little peanut is up to 10.4 lbs now...
The Doctor is very happy with her progress.
The Doctor is very happy with her progress.
Well folks that is about all I have for you today... hope you are all staying warm in these frigid temps... but at least the sun is shining.
It is 4°F (hit Alt 0176 for this the little degree symbol) here today.
My driveway could use a good shoveling but that isn't likely to happen today with this temperature.
Have a great day.
Thanks for stopping by...
Hugs, Deb
13 comments:
Thanks for the Tut! Great process and easy to follow. Little Mya is adorable in her new coat and hat!
The cabinet looks great. Mya looks like a little munchkin in the hat and coat. I'm surprised you could find one small enough for her. She just keeps getting cuter with every picture.
Love the look of the cabinet, thank you for the tutorial, you did a great job explaining. Say warm.
She is so cute! Love your cabinet the red is great.
Stop by and sign up for my giveaway!
xoxo
Love the cabinet! How great to have a friend like you. Her grandson did a fantastic job making it for her. The tutorial is great! Mya is just an angel even if the hat is a bit big. Love the fur coat!
Mya is a darling! Love her coat and she will grow into and out of that hat all too soon!
Thanks for sharing your project!
★Linda★
my driveway needs shoveling too. :(
the cabinet turned out great! LOVE the color. mrs c is going to LOVE it! great tute!
ohhh, and that sweet little mya... she IS a sweetie! Love her in her new coat!
take care, stay warm!
gail
Definitely staying warm!
Mya looks very snug there!
Great job on the box!
I know that Mrs. C is going to love how the cabinet turned out!! You did an awesome job and your tips and tricks.......love them :)
Oh my goodness, Mya is a fashion princess all the way. She'll grow into things as she's growing like a weed and just gets cuter by the minute :)
Have a great week sweetie!
Hugs,
Laura
Great tutorial. I love that color!
Mya is just too darn cute in that coat and hat. Give her a big kiss for me, will ya?
Oh Miss Mya you look lovely in your little coat....and Grandma Deb I love you cabinet...wish I could paint distress as you do....lovely work..
Oh! So beautiful! Thanks for the tute - if I ever get that far, I have lots of things to pretty up that way, love the dark, rich look! That Mya is just too cute for words! Love the little hat and before you know it it will be too small! What a little doll!
That turned out fabulous. Thanks for the tute...and of course, for our Mya fix :)
Post a Comment